How do I get the best print results from exported PDFs?
Last updated: October 15, 2026
Your papers are graded and now you want to hand them back on paper. It's one of several ways to return graded work: see Comment s’opère le rendu des copies aux élèves ?. So how do you print them without wasting paper or time?
Export options
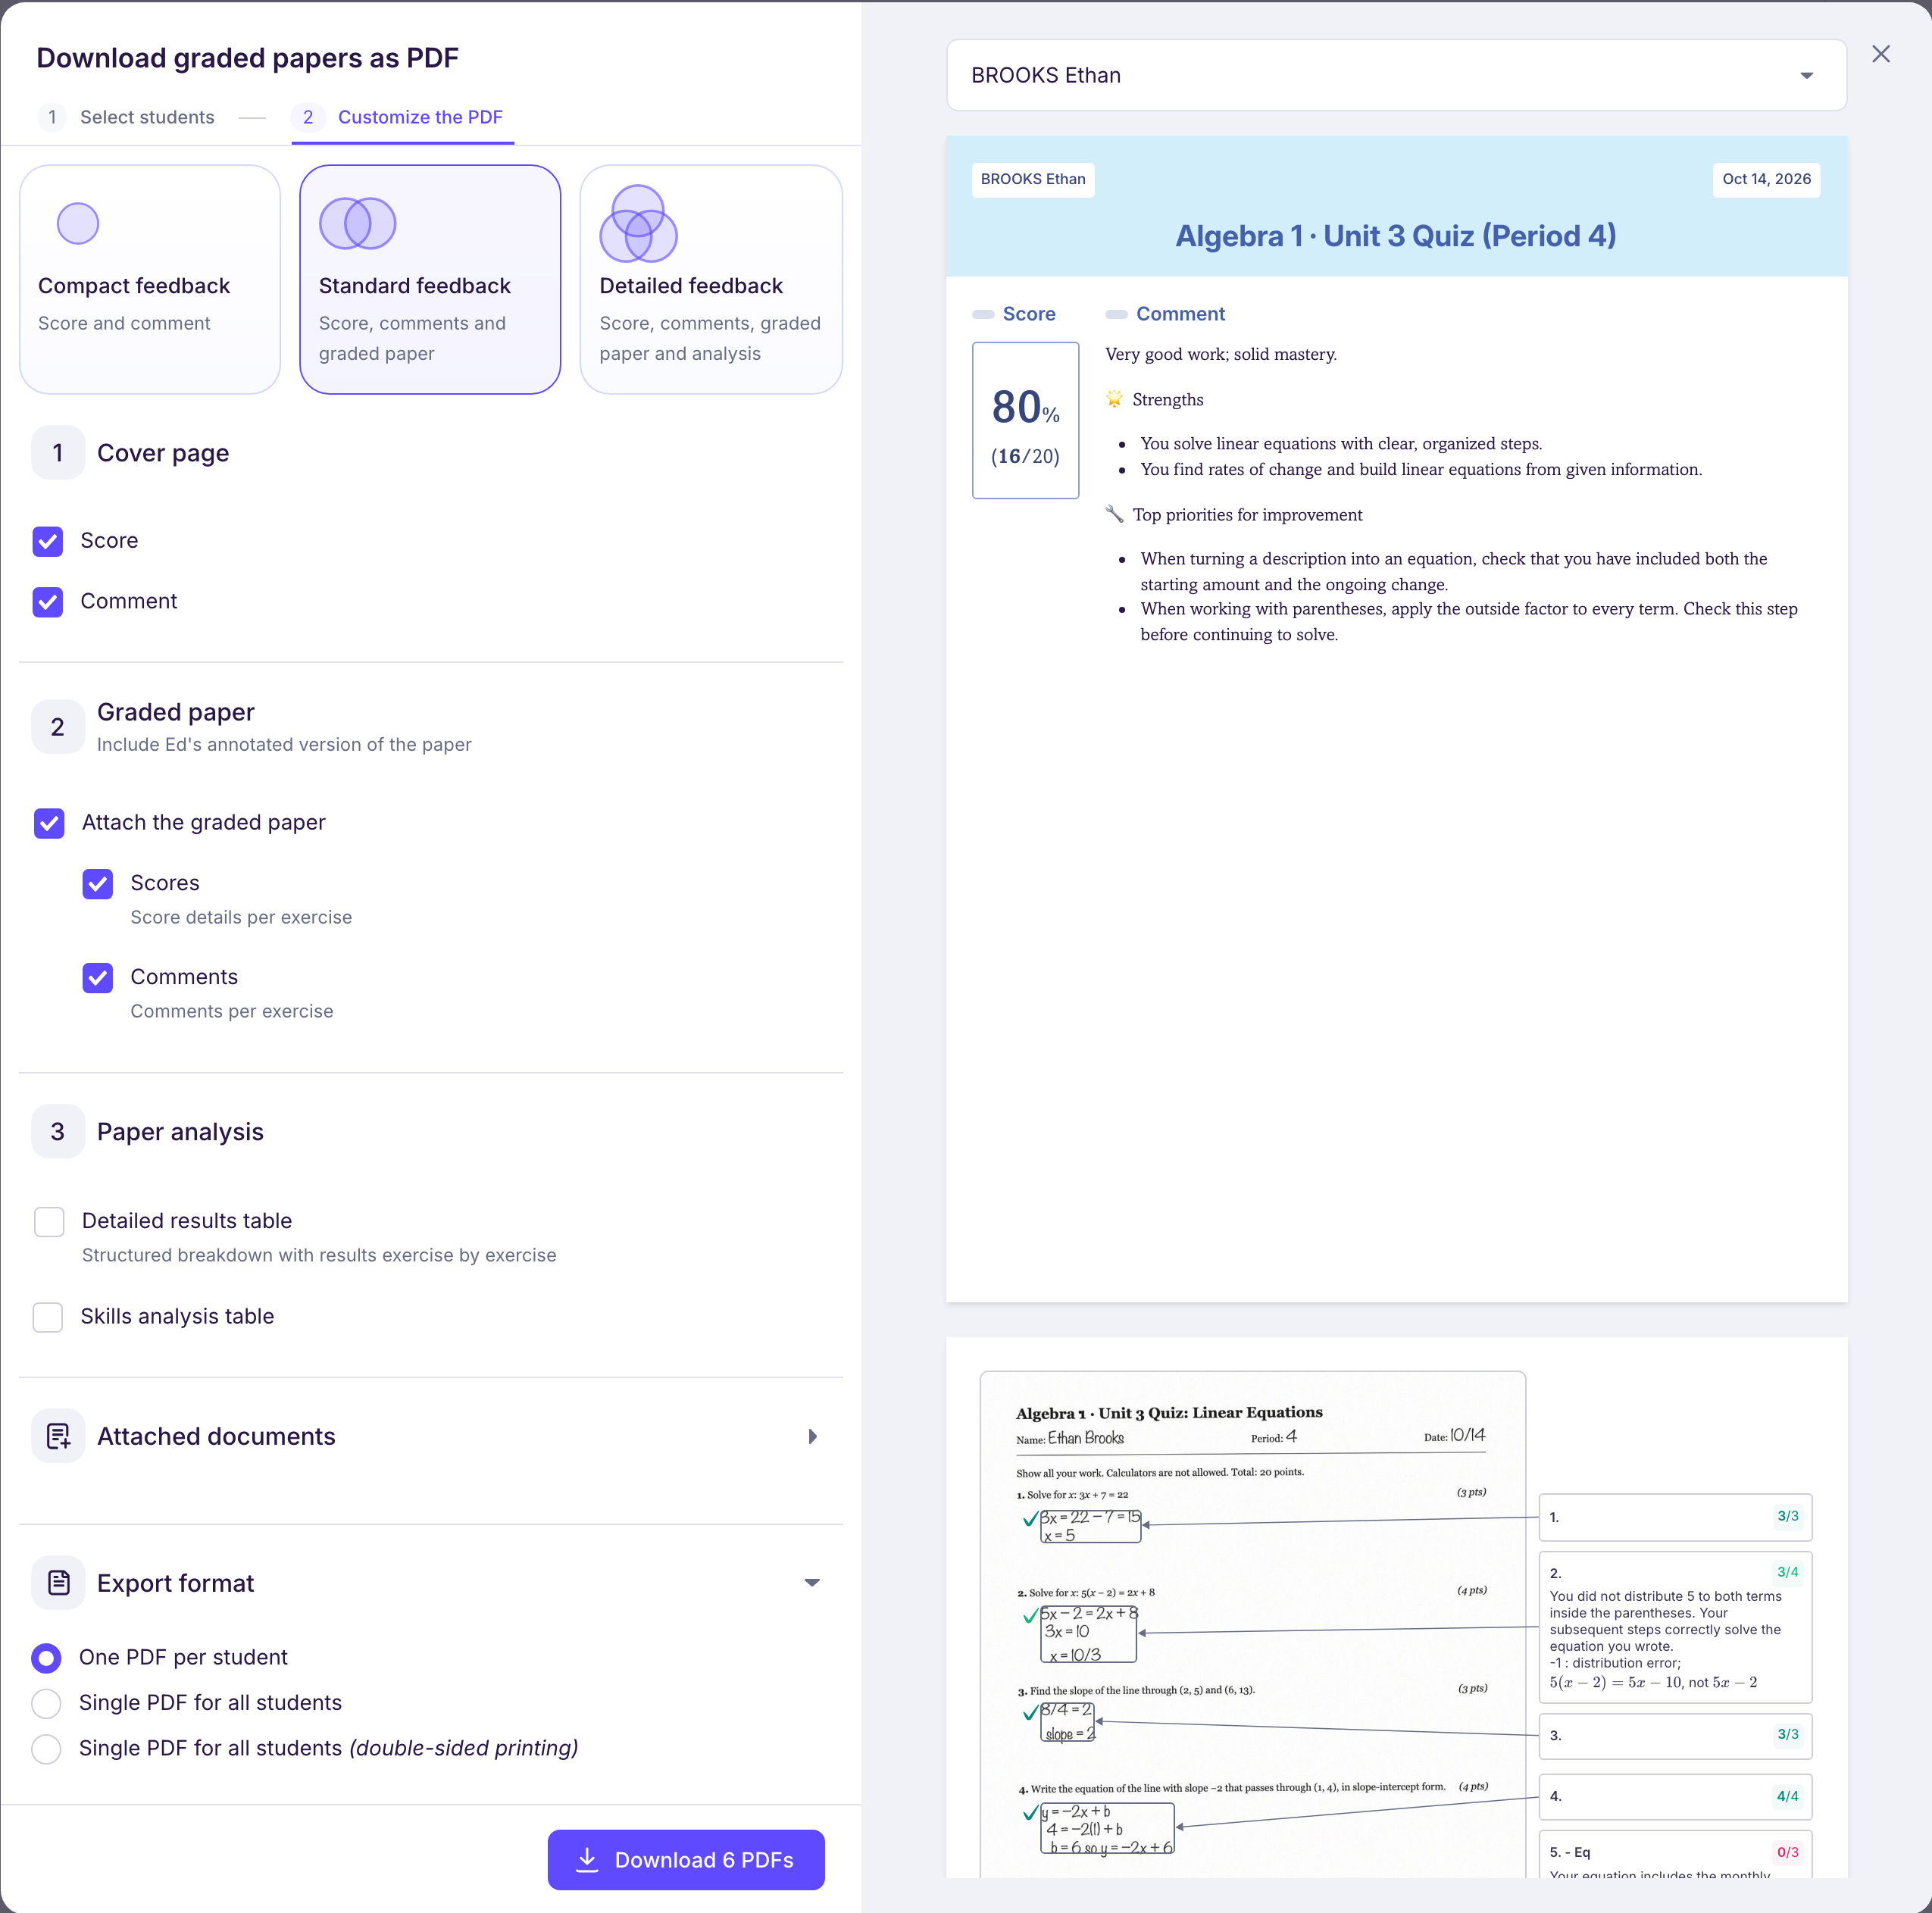
You have plenty of choices when you customize the PDF:
-
show scores, comments, or both
-
include the graded paper (the student's paper with comments and/or scores in the margin)
-
include a more or less detailed analysis of the paper (observations can take up space)
-
include the student's original scanned paper and/or the question sheet and answer key (or not)
Then choose how the files are packaged:
-
“One PDF per student”: a ZIP file with one PDF file per student, most useful for your records or for sharing
-
“Single PDF for all students”: one file that combines every student's documents, set up for single-sided printing
-
“Single PDF for all students (double-sided printing)”: one file set up for double-sided printing. It includes blank pages, so you never end up with one student on the front of a sheet and another on the back
The printing itself
You have your PDF and you're ready to print. (The steps below use a Mac, but it works much the same on Windows.)
-
Make sure your print settings match the option you chose when downloading (single- or double-sided).
-
Choose Scale rather than Scale to Fit.
-
Set the scale to 100%. This keeps your printer from adding margins on top of the ones we've built in, and keeps the scanned pages from shrinking into fine print 🤭
And of course, before you print a whole class set, print the first few pages with the page range option and check that everything looks right.