How do I scan papers with my school copier?
Last updated: October 15, 2026
1️⃣ Prep the papers
Before you start scanning:
-
Unfold folded or booklet-style papers so they lie flat (use the 11x17 / Ledger setting if your copier has one)
-
📏 Flatten the papers, especially folded ones
-
📄 Remove staples, paper clips and anything glued or taped on to avoid thick spots
-
Avoid sheets that are badly wrinkled or torn
2️⃣ Choose how to scan
You have two options:
The whole stack at once
-
Load the whole stack into the document feeder on top of the machine
-
You can usually mix paper sizes in the same stack
- 💡 Tip: tap the stack on the table before loading it so the sheets line up along one edge
-
If you have a really big stack, split it into several batches
Works great when the papers are flat and nothing is glued or stapled
One page at a time
- Place the pages one by one on the glass, under the lid
Slower, but reliable even if the papers come in all sizes or are in rough shape
3️⃣ Three ways to save your scans
-
Start by entering your access code on the machine.
-
Select the Scan function.
Then you have three options.
📬 Option 1: scan to email
-
Choose Scan to email
-
Type your email address, or pick it from the list
-
Press Start
💡 Check your spam folder if nothing arrives
📌 After the first time, your address is usually saved and you won’t have to type it again.
💾 Option 2: save to a USB drive
-
Plug in your USB drive before you start
-
Select Scan to USB (sometimes called Scan to storage device)
-
Press Start
📌 Tip: you can often rename the file or the folder before scanning
🌐 Option 3: save to your school’s network drive
-
Choose Scan to network folder (or Scan to server)
-
Press Start
-
Then find the scanned files from a computer on the school network, in the folder your school uses for scans (ask your IT coordinator where it is).
4️⃣ Set up the scanner
Settings not to miss
✅ Two-sided (duplex): you often have to select it again each time you start a scan
✅ Color mode
✅ PDF (recommended format)
👉 In Ed.ai, import the file with “Batch import”: each student’s pages must be in a row. When you import it, a message confirms that your PDF is being processed and shows how many pages were detected. You then get an automatic email once processing is complete. A batch import adds up to 15 minutes of processing time.
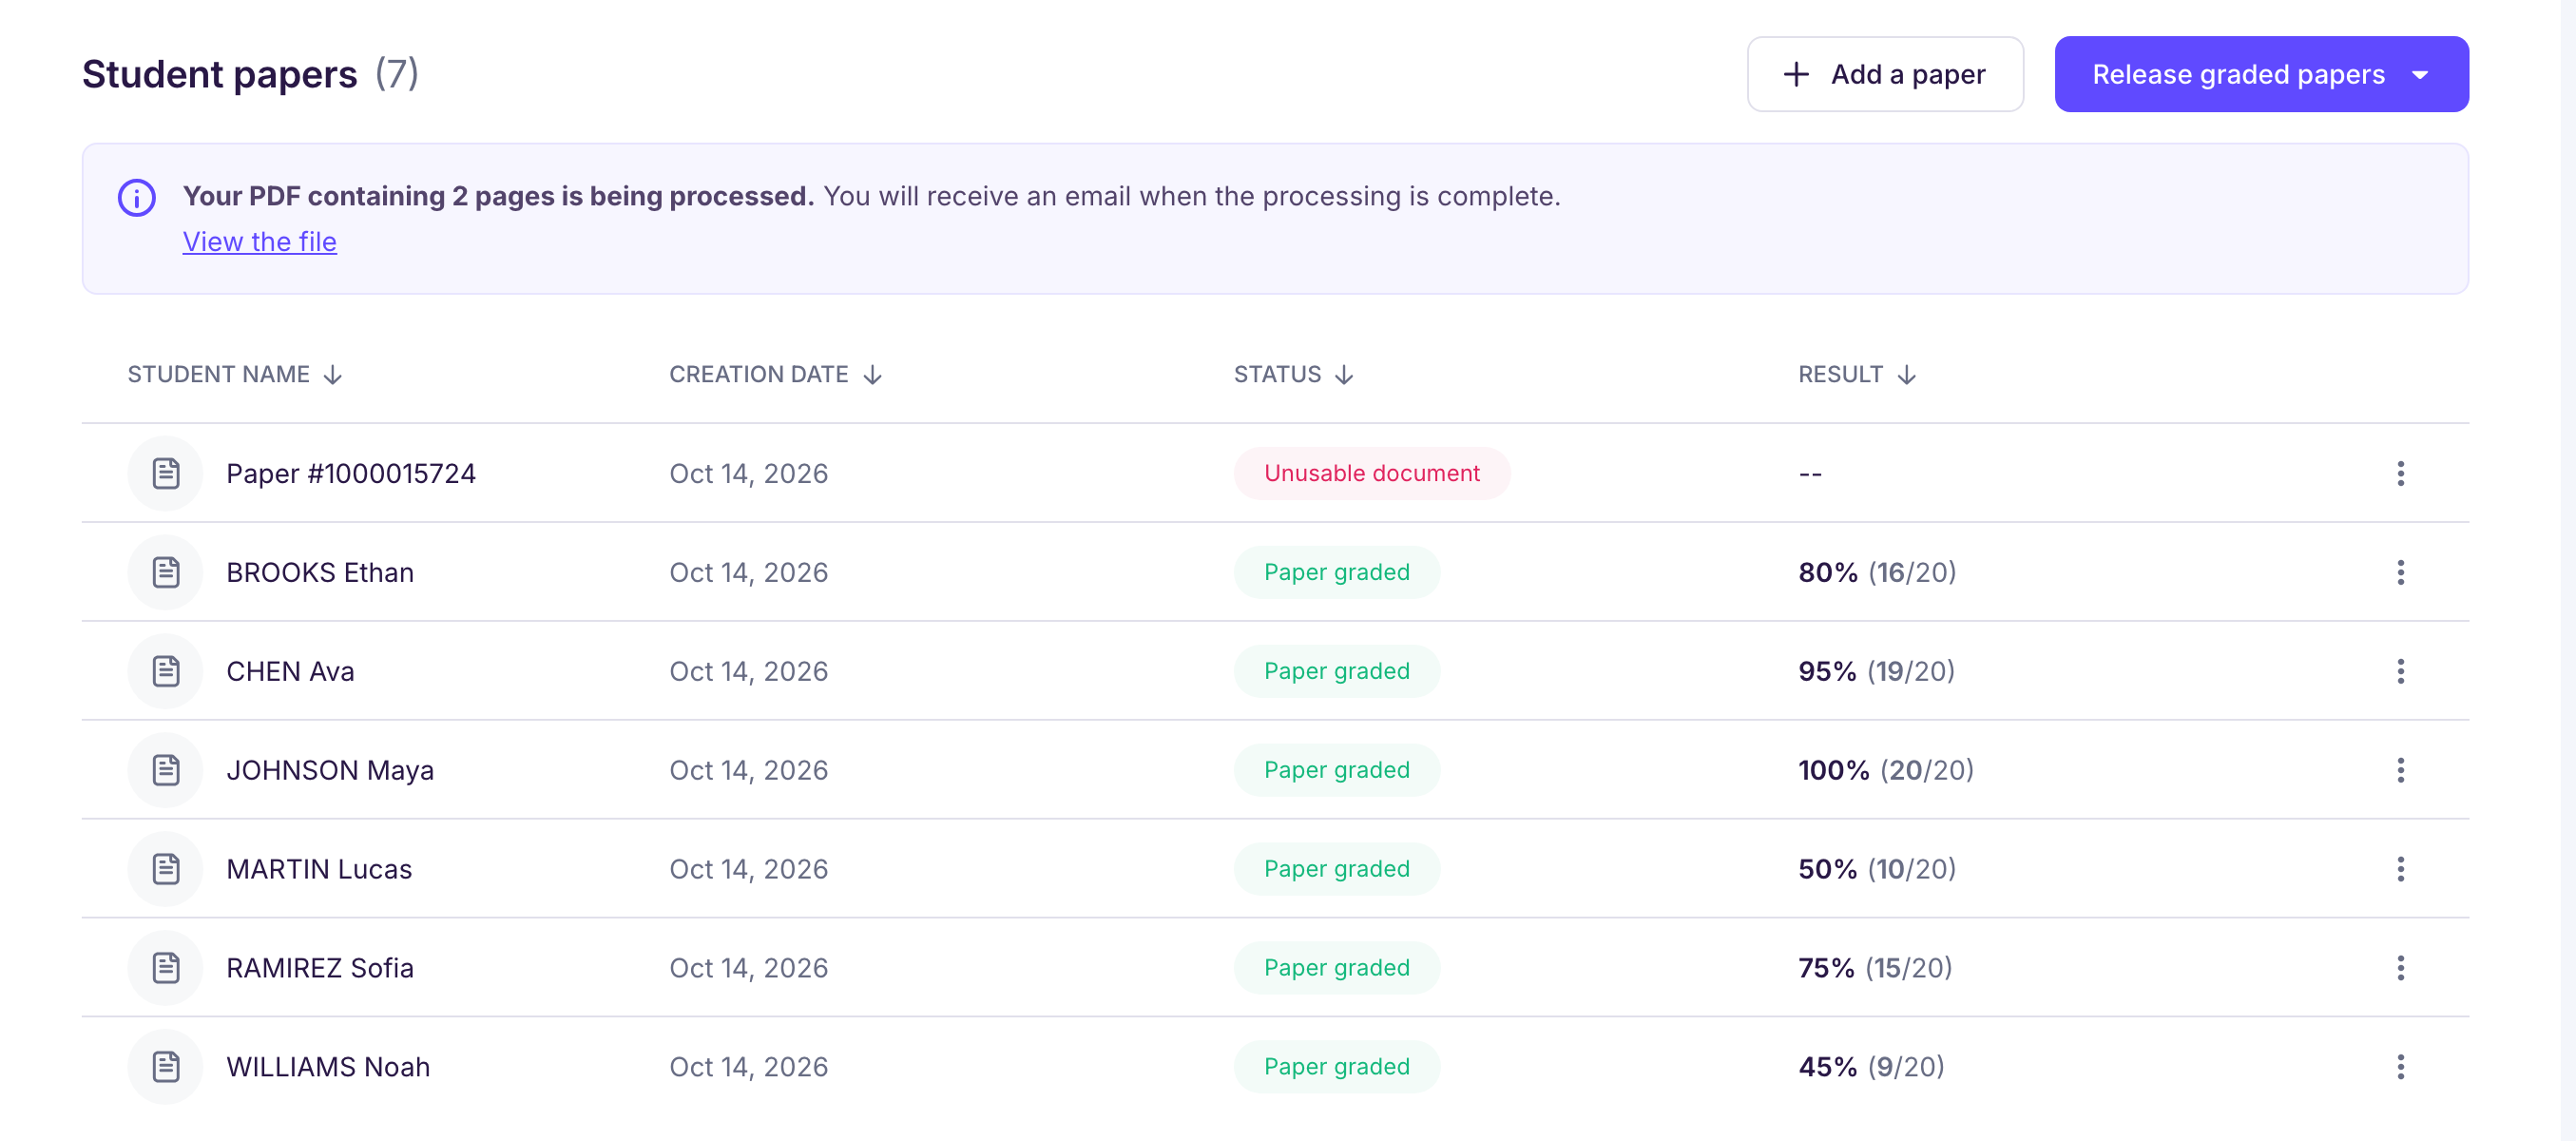
⚠️ So there’s no need to start the same import several times: it only creates duplicates.
If the machine asks:
✅ Resolution (200 to 400 dpi recommended)
📌 Press OK after each setting
5️⃣ While it scans
⏱️ Plan on 3 to 10 minutes for 35 two-sided papers
👀 Stay near the machine: if it looks idle, a colleague might start using it by mistake
👀 Keep an eye out for paper jams
❗ What if the paper jams?
Don’t panic! Here’s what to do:
-
The copier shows a clear message, something like:
“Paper jam: open cover A” or “Remove paper from tray X”.
-
🧩 Follow the on-screen instructions: most machines show very clear diagrams.
-
📄 Gently remove the stuck sheet:
→ Pull slowly so it doesn’t tear.
→ Check that no scraps are left inside.
-
🔁 Close all the panels and wait for the machine to restart on its own.
→ If needed, press “Resume” or “Restart job”.
-
📞 When in doubt, call your school’s go-to person (IT coordinator, front office or technician).
💡 Tip: prevent jams by lightly tapping the stack before loading it so the sheets line up.
🚀 Quick checklist
✅ Papers flattened, booklet pages unfolded
✅ A USB drive on hand, depending on your copier’s options
✅ Two-sided and color modes turned on
✅ The PDF confirmation message showing in Ed.ai after you import